1 安装nginx 1.1 安装步骤 nginx的源码下载地址: https://nginx.org/download/nginx-1.20.1.tar.gz
第一步:下载nginx源码包。 1 2 wget https://nginx.org/download/nginx-1.20.1.tar.gz yum install make gcc wget pcre-devel openssl openssl-devel -y
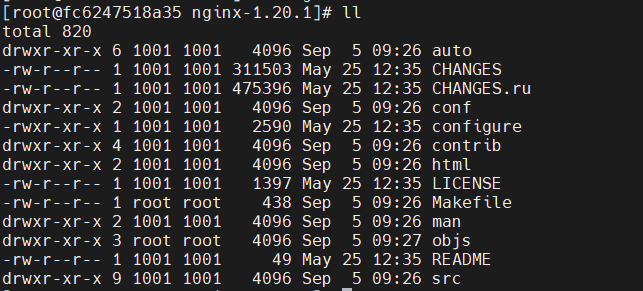
第二步:解压 1 2 tar -zxvf nginx-1.20.1.tar.gz cd nginx-1.20.1
第三步:安装 其中configure是一个可执行文件,执行如下命令,执行:
1 2 3 4 ./configure --prefix=/usr/l make make install whereis nginx
第四步:启动nginx 使用whereis nginx命令可以知道nginx安装在哪个目录,然后到nginx的目录中的sbin目录下执行nginx的可执行文件。
1 2 /usr/local/nginx/sbin/nginx ps -ef | grep nginx
1.2 设置nginx开机启动 第一步:进入到/lib/systemd/system/目录 第二步:创建nginx.service文件,并编辑 内容如下:
1 2 3 4 5 6 7 8 9 10 11 12 13 [Unit] Description=nginx service After=network.target [Service] Type=forking ExecStart=/usr/local/nginx/sbin/nginx ExecReload=/usr/local/nginx/sbin/nginx -s reload ExecStop=/usr/local/nginx/sbin/nginx -s quit PrivateTmp=true [Install] WantedBy=multi-user.target
说明:
Description:描述服务
After:描述服务类别
[Service]服务运行参数的设置
Type=forking是后台运行的形式
ExecStart为服务的具体运行命令
ExecReload为重启命令
ExecStop为停止命令
PrivateTmp=True表示给服务分配独立的临时空间
注意:[Service]的启动、重启、停止命令全部要求使用绝对路径 [Install]运行级别下服务安装的相关设置,可设置为多用户,即系统运行级别为3
最后保存退出。
第三步:加入开机自启动 1、设置开机自启动
2、查看nginx状态
很奇怪,明明启动成功了,为什么显示Active: inactive (dead)?
3、杀死nginx重启nginx
再次查看状态,变成了active,搞定。
4、重启服务器
5、再次连接后,查看服务状态
看到nginx已经启动,至此,nginx自启动配置成功。
如果不想开机自启动了,可以使用下面的命令取消开机自启动
第四步:服务的启动/停止/刷新配置文件/查看状态 命令行启动 1 2 3 4 5 6 # 启动nginx /usr/sbin/nginx # 检查nginx配置语法 /usr/sbin/nginx -t # 重启nginx /usr/sbin/nginx -s reload
1.3 nginx配置及说明 1 2 3 4 5 6 7 8 9 10 11 12 13 14 15 16 17 18 19 20 21 22 23 24 25 26 27 28 29 30 31 32 33 34 35 36 37 38 39 40 41 42 43 44 45 46 47 48 49 50 51 52 53 54 55 56 57 58 59 60 61 62 63 64 65 66 67 68 69 70 71 72 73 74 75 76 77 78 79 80 81 82 83 84 85 86 87 88 89 90 91 92 93 94 95 96 97 98 99 100 101 102 103 104 105 106 107 108 109 110 111 112 113 114 115 116 117 118 119 120 121 122 123 124 125 126 127 128 129 130 131 132 133 134 135 136 137 138 139 140 141 142 143 144 145 146 147 148 149 150 151 152 153 154 155 156 157 158 159 160 161 162 163 164 165 166 167 168 169 170 171 172 173 174 175 176 177 178 179 180 181 182 183 184 185 186 187 188 189 190 191 192 193 194 195 ######Nginx配置文件nginx.conf中文详解##### #定义Nginx运行的用户和用户组 user www www; #nginx进程数,建议设置为等于CPU总核心数。 worker_processes 8; #全局错误日志定义类型,[ debug | info | notice | warn | error | crit ] error_log /usr/local/nginx/logs/error.log info; #进程pid文件 pid /usr/local/nginx/logs/nginx.pid; #指定进程可以打开的最大描述符:数目 #工作模式与连接数上限 #这个指令是指当一个nginx进程打开的最多文件描述符数目,理论值应该是最多打开文件数(ulimit -n)与nginx进程数相除,但是nginx分配请求并不是那么均匀,所以最好与ulimit -n 的值保持一致。 #现在在linux 2.6内核下开启文件打开数为65535,worker_rlimit_nofile就相应应该填写65535。 #这是因为nginx调度时分配请求到进程并不是那么的均衡,所以假如填写10240,总并发量达到3-4万时就有进程可能超过10240了,这时会返回502错误。 worker_rlimit_nofile 65535; events { #参考事件模型,use [ kqueue | rtsig | epoll | /dev/poll | select | poll ]; epoll模型 #是Linux 2.6以上版本内核中的高性能网络I/O模型,linux建议epoll,如果跑在FreeBSD上面,就用kqueue模型。 #补充说明: #与apache相类,nginx针对不同的操作系统,有不同的事件模型 #A)标准事件模型 #Select、poll属于标准事件模型,如果当前系统不存在更有效的方法,nginx会选择select或poll #B)高效事件模型 #Kqueue:使用于FreeBSD 4.1+, OpenBSD 2.9+, NetBSD 2.0 和 MacOS X.使用双处理器的MacOS X系统使用kqueue可能会造成内核崩溃。 #Epoll:使用于Linux内核2.6版本及以后的系统。 #/dev/poll:使用于Solaris 7 11/99+,HP/UX 11.22+ (eventport),IRIX 6.5.15+ 和 Tru64 UNIX 5.1A+。 #Eventport:使用于Solaris 10。 为了防止出现内核崩溃的问题, 有必要安装安全补丁。 use epoll; #单个进程最大连接数(最大连接数=连接数*进程数) #根据硬件调整,和前面工作进程配合起来用,尽量大,但是别把cpu跑到100%就行。每个进程允许的最多连接数,理论上每台nginx服务器的最大连接数为。 worker_connections 65535; #keepalive超时时间。 keepalive_timeout 60; #客户端请求头部的缓冲区大小。这个可以根据你的系统分页大小来设置,一般一个请求头的大小不会超过1k,不过由于一般系统分页都要大于1k,所以这里设置为分页大小。 #分页大小可以用命令getconf PAGESIZE 取得。 #[root@web001 ~]# getconf PAGESIZE #4096 #但也有client_header_buffer_size超过4k的情况,但是client_header_buffer_size该值必须设置为“系统分页大小”的整倍数。 client_header_buffer_size 4k; #这个将为打开文件指定缓存,默认是没有启用的,max指定缓存数量,建议和打开文件数一致,inactive是指经过多长时间文件没被请求后删除缓存。 open_file_cache max=65535 inactive=60s; #这个是指多长时间检查一次缓存的有效信息。 #语法:open_file_cache_valid time 默认值:open_file_cache_valid 60 使用字段:http, server, location 这个指令指定了何时需要检查open_file_cache中缓存项目的有效信息. open_file_cache_valid 80s; #open_file_cache指令中的inactive参数时间内文件的最少使用次数,如果超过这个数字,文件描述符一直是在缓存中打开的,如上例,如果有一个文件在inactive时间内一次没被使用,它将被移除。 #语法:open_file_cache_min_uses number 默认值:open_file_cache_min_uses 1 使用字段:http, server, location 这个指令指定了在open_file_cache指令无效的参数中一定的时间范围内可以使用的最小文件数,如果使用更大的值,文件描述符在cache中总是打开状态. open_file_cache_min_uses 1; #语法:open_file_cache_errors on | off 默认值:open_file_cache_errors off 使用字段:http, server, location 这个指令指定是否在搜索一个文件是记录cache错误. open_file_cache_errors on; } #设定http服务器,利用它的反向代理功能提供负载均衡支持 http { #文件扩展名与文件类型映射表 include /etc/nginx/mime.types; #默认文件类型 default_type application/octet-stream; #默认编码 #charset utf-8; #服务器名字的hash表大小 #保存服务器名字的hash表是由指令server_names_hash_max_size 和server_names_hash_bucket_size所控制的。参数hash bucket size总是等于hash表的大小,并且是一路处理器缓存大小的倍数。在减少了在内存中的存取次数后,使在处理器中加速查找hash表键值成为可能。如果hash bucket size等于一路处理器缓存的大小,那么在查找键的时候,最坏的情况下在内存中查找的次数为2。第一次是确定存储单元的地址,第二次是在存储单元中查找键 值。因此,如果Nginx给出需要增大hash max size 或 hash bucket size的提示,那么首要的是增大前一个参数的大小. server_names_hash_bucket_size 128; #客户端请求头部的缓冲区大小。这个可以根据你的系统分页大小来设置,一般一个请求的头部大小不会超过1k,不过由于一般系统分页都要大于1k,所以这里设置为分页大小。分页大小可以用命令getconf PAGESIZE取得。 client_header_buffer_size 32k; #客户请求头缓冲大小。nginx默认会用client_header_buffer_size这个buffer来读取header值,如果header过大,它会使用large_client_header_buffers来读取。 large_client_header_buffers 4 64k; #设定通过nginx上传文件的大小 client_max_body_size 8m; #开启高效文件传输模式,sendfile指令指定nginx是否调用sendfile函数来输出文件,对于普通应用设为 on,如果用来进行下载等应用磁盘IO重负载应用,可设置为off,以平衡磁盘与网络I/O处理速度,降低系统的负载。注意:如果图片显示不正常把这个改成off。 #sendfile指令指定 nginx 是否调用sendfile 函数(zero copy 方式)来输出文件,对于普通应用,必须设为on。如果用来进行下载等应用磁盘IO重负载应用,可设置为off,以平衡磁盘与网络IO处理速度,降低系统uptime。 sendfile on; #开启目录列表访问,合适下载服务器,默认关闭。 autoindex on; #此选项允许或禁止使用socke的TCP_CORK的选项,此选项仅在使用sendfile的时候使用 tcp_nopush on; tcp_nodelay on; #长连接超时时间,单位是秒 keepalive_timeout 120; #FastCGI相关参数是为了改善网站的性能:减少资源占用,提高访问速度。下面参数看字面意思都能理解。 fastcgi_connect_timeout 300; fastcgi_send_timeout 300; fastcgi_read_timeout 300; fastcgi_buffer_size 64k; fastcgi_buffers 4 64k; fastcgi_busy_buffers_size 128k; fastcgi_temp_file_write_size 128k; #gzip模块设置 gzip on; #开启gzip压缩输出 gzip_min_length 1k; #最小压缩文件大小 gzip_buffers 4 16k; #压缩缓冲区 gzip_http_version 1.0; #压缩版本(默认1.1,前端如果是squid2.5请使用1.0) gzip_comp_level 2; #压缩等级 gzip_types text/plain application/x-javascript text/css application/xml; #压缩类型,默认就已经包含textml,所以下面就不用再写了,写上去也不会有问题,但是会有一个warn。 gzip_vary on; #开启限制IP连接数的时候需要使用 #limit_zone crawler $binary_remote_addr 10m; #负载均衡配置 upstream piao.jd.com { #upstream的负载均衡,weight是权重,可以根据机器配置定义权重。weigth参数表示权值,权值越高被分配到的几率越大。 server 192.168.80.121:80 weight=3; server 192.168.80.122:80 weight=2; server 192.168.80.123:80 weight=3; #nginx的upstream目前支持4种方式的分配 #1、轮询(默认) #每个请求按时间顺序逐一分配到不同的后端服务器,如果后端服务器down掉,能自动剔除。 #2、weight #指定轮询几率,weight和访问比率成正比,用于后端服务器性能不均的情况。 #例如: #upstream bakend { # server 192.168.0.14 weight=10; # server 192.168.0.15 weight=10; #} #2、ip_hash #每个请求按访问ip的hash结果分配,这样每个访客固定访问一个后端服务器,可以解决session的问题。 #例如: #upstream bakend { # ip_hash; # server 192.168.0.14:88; # server 192.168.0.15:80; #} #3、fair(第三方) #按后端服务器的响应时间来分配请求,响应时间短的优先分配。 #upstream backend { # server server1; # server server2; # fair; #} #4、url_hash(第三方) #按访问url的hash结果来分配请求,使每个url定向到同一个后端服务器,后端服务器为缓存时比较有效。 #例:在upstream中加入hash语句,server语句中不能写入weight等其他的参数,hash_method是使用的hash算法 #upstream backend { # server squid1:3128; # server squid2:3128; # hash $request_uri; # hash_method crc32; #} #tips: #upstream bakend{#定义负载均衡设备的Ip及设备状态}{ # ip_hash; # server 127.0.0.1:9090 down; # server 127.0.0.1:8080 weight=2; # server 127.0.0.1:6060; # server 127.0.0.1:7070 backup; #} #在需要使用负载均衡的server中增加 proxy_pass http://bakend/; #每个设备的状态设置为: #1.down表示单前的server暂时不参与负载 #2.weight为weight越大,负载的权重就越大。 #3.max_fails:允许请求失败的次数默认为1.当超过最大次数时,返回proxy_next_upstream模块定义的错误 #4.fail_timeout:max_fails次失败后,暂停的时间。 #5.backup: 其它所有的非backup机器down或者忙的时候,请求backup机器。所以这台机器压力会最轻。 #nginx支持同时设置多组的负载均衡,用来给不用的server来使用。 #client_body_in_file_only设置为On 可以讲client post过来的数据记录到文件中用来做debug #client_body_temp_path设置记录文件的目录 可以设置最多3层目录 #location对URL进行匹配.可以进行重定向或者进行新的代理 负载均衡 }
1.4 模块化配置 nginx配置可以使用include导入,在企业开发过程中,可能会有很多网站,一个网站对应一个nginx配置,所以我们希望nginx配置添加或删除能够遵循开闭原则,因为nginx配置使用的配置文件是etc/nginx/nginx.conf,所以可以在此文件中添加一个导入的语句,在server标签下面添加如下语句:
1 include /etc/nginx/include/*.conf;
该语句的意思为:在配置文件目录下在创建一个文件夹,然后导入该文件夹下所有以conf结尾的文件,而这个文件就是开启一个新的nginx域名的基础配置。
1 2 3 4 5 6 7 8 9 10 11 12 13 14 15 16 17 18 19 20 21 22 23 24 25 26 27 28 29 30 31 32 33 34 35 36 37 38 39 40 41 42 43 44 45 46 47 48 49 50 51 52 53 54 55 56 57 58 59 60 61 62 63 64 65 66 67 68 69 70 71 72 73 74 75 76 77 78 79 80 81 82 83 # For more information on configuration, see: # * Official English Documentation: http://nginx.org/en/docs/ # * Official Russian Documentation: http://nginx.org/ru/docs/ user nginx; worker_processes auto; error_log /var/log/nginx/error.log; pid /run/nginx.pid; # Load dynamic modules. See /usr/share/doc/nginx/README.dynamic. include /usr/share/nginx/modules/*.conf; events { worker_connections 1024; } http { log_format main '$remote_addr - $remote_user [$time_local] "$request" ' '$status $body_bytes_sent "$http_referer" ' '"$http_user_agent" "$http_x_forwarded_for"'; access_log /var/log/nginx/access.log main; sendfile on; tcp_nopush on; tcp_nodelay on; keepalive_timeout 65; types_hash_max_size 4096; include /etc/nginx/mime.types; default_type application/octet-stream; # Load modular configuration files from the /etc/nginx/conf.d directory. # See http://nginx.org/en/docs/ngx_core_module.html#include # for more information. include /etc/nginx/conf.d/*.conf; server { listen 80; listen [::]:80; server_name _; root /usr/share/nginx/html; # Load configuration files for the default server block. include /etc/nginx/default.d/*.conf; error_page 404 /404.html; location = /404.html { } error_page 500 502 503 504 /50x.html; location = /50x.html { } } include /etc/nginx/include/*.conf; # 在配置文件目录下在创建一个文件夹,然后导入该文件夹下所有以conf结尾的文件,而这个文件就是开启一个新的nginx域名的基础配置 # Settings for a TLS enabled server. # # server { # listen 443 ssl http2; # listen [::]:443 ssl http2; # server_name _; # root /usr/share/nginx/html; # # ssl_certificate "/etc/pki/nginx/server.crt"; # ssl_certificate_key "/etc/pki/nginx/private/server.key"; # ssl_session_cache shared:SSL:1m; # ssl_session_timeout 10m; # ssl_ciphers HIGH:!aNULL:!MD5; # ssl_prefer_server_ciphers on; # # # Load configuration files for the default server block. # include /etc/nginx/default.d/*.conf; # # error_page 404 /404.html; # location = /40x.html { # } # # error_page 500 502 503 504 /50x.html; # location = /50x.html { # } # } }
include文件夹下的所有以.conf结尾的文件都会被导入到nginx.conf配置中,该文件夹下的配置模板如下:
1 2 3 4 5 6 7 8 9 10 11 12 13 14 15 16 17 18 19 20 21 22 23 24 25 26 27 28 29 30 31 32 33 34 35 36 37 38 39 40 41 server { listen 80 default_server; # 这里改动了,也可以写你的域名 server_name zhg.com; # 默认网站根目录(www目录) root /home/centos/www; access_log /data/nginx/logs/zhg.com/access.log; #访问日志 error_log /data/nginx/logs/zhg.com/error.log; #错误日志 # Load configuration files for the default server block. include /etc/nginx/default.d/*.conf; location / { # 这里改动了 定义首页索引文件的名称 index index.php index.html index.htm; } error_page 404 /404.html; location = /40x.html { } error_page 500 502 503 504 /50x.html; location = /50x.html { } # 这里新加的 # PHP 脚本请求全部转发到 FastCGI处理. 使用FastCGI协议默认配置. # Fastcgi服务器和程序(PHP,Python)沟通的协议. location ~ \.php$ { # 设置监听端口 fastcgi_pass 127.0.0.1:9000; # 设置nginx的默认首页文件(上面已经设置过了,可以删除) fastcgi_index index.php; # 设置脚本文件请求的路径 fastcgi_param SCRIPT_FILENAME $document_root$fastcgi_script_name; # 引入fastcgi的配置文件 include /etc/nginx/fastcgi_params; } }
1.5 用nginx区分测试和线上环境 设置格式:
在fastcgi_params文件中配置
1 fastcgi_param RUNTIME_ENVIROMENT 'DEV';
其中,RUNTIME_ENVIROMENT是自定义的名字,可以根据需要自己定义
在nginx.conf中配置如下:
1 2 3 4 5 6 7 8 9 10 11 12 13 14 15 16 17 18 19 server { listen 80; root /var/www; index index.php; server_name localhost; location / { index index.php; } location ~ .*\.(php|php5)?$ { fastcgi_pass 127.0.0.1:9000; fastcgi_index index.php; include fastcgi_params; #需要在fastcgi_params文件中定义环境变量 #或者 #fastcgi_param RUNTIME_ENVIROMENT 'DEV'; } }
在PHP中有两个调用方式:
1 $env = getenv ('RUNTIME_ENVIROMENT' );
还有超全局变量方式:
1 $env = $_SERVER ['RUNTIME_ENVIROMENT' ];
2 安装PHP 2.1 前置安装 1 2 3 4 5 6 7 8 9 10 11 12 13 14 yum install gcc-c++ -y yum install https://dl.fedoraproject.org/pub/epel/epel-release-latest-7.noarch.rpm yum install http://rpms.remirepo.net/enterprise/remi-release-7.rpm yum -y install yum-utils yum-config-manager --enable remi-php71 [ 安装PHP 7.1 ] yum-config-manager --enable remi-php72 [ 安装PHP 7.2 ] yum-config-manager --enable remi-php73 [ 安装PHP 7.3 ]
为了方便运行,将上述的前置安装整理成一条安装命令:
1 2 3 yum -y install gcc-c++ https://dl.fedoraproject.org/pub/epel/epel-release-latest-7.noarch.rpm http://rpms.remirepo.net/enterprise/remi-release-7.rpm yum-utils yum-config-manager --enable remi-php73
2.1.1 安装PHP及依赖包 1 yum -y install php php-mcrypt php-devel php-cli php-gd php-pear php-curl php-fpm php-mysql php-ldap php-zip php-fileinfo --skip-broken
2.2 yum安装 配置yum源:
1 2 rpm -Uvh https://dl.fedoraproject.org/pub/epel/epel-release-latest-7.noarch.rpm rpm -Uvh https://mirror.webtatic.com/yum/el7/webtatic-release.rpm
安装命令:
1 yum -y install php71w-devel php71w-fpm
安装完成之后,然后通过whereis命令查看安装地址:
因为nginx服务器是不能执行php代码的,也就是说nginx服务器是将php代码转发给php-fpm进行处理,由php-fpm处理完之后将结果返回给nginx渲染返回给客户端,所以,如果需要nginx能够解析出php页面,则必须在服务器开启php-fpm,开启命令:
查看是否开启成功:
1 2 3 4 5 6 7 8 [root@localhost nginx]# ps -ef | grep php root 50519 1 0 23:02 ? 00:00:00 php-fpm: master process (/etc/php-fpm.conf) apache 50520 50519 0 23:02 ? 00:00:00 php-fpm: pool www apache 50521 50519 0 23:02 ? 00:00:00 php-fpm: pool www apache 50522 50519 0 23:02 ? 00:00:00 php-fpm: pool www apache 50523 50519 0 23:02 ? 00:00:00 php-fpm: pool www apache 50524 50519 0 23:02 ? 00:00:00 php-fpm: pool www root 50531 21468 0 23:02 pts/1 00:00:00 grep --color=auto php
常见错误:
1 2021/11/13 22:54:13 [error] 49804#49804: *54 connect() failed (111: Connection refused) while connecting to upstream, client: 192.168.1.17, server: zhg.com, request: "GET /1.php HTTP/1.1", upstream: "fastcgi://127.0.0.1:9000", host: "zhg.com"
遇到这种错误,首先检查nginx配置是否正确,检查发现nginx配置正确之后,在检查是否开启了php-fpm。我的错误原因是没有开启php-fpm。开启就能正常显示了。
2.3 源码安装 1 2 3 4 5 6 7 8 9 10 11 12 13 14 15 16 //1 下载源码包 wget https://www.php.net/distributions/php-7.2.16.tar.gz //2 解压 tar zxvf php-7.2.16.tar.gz //3 配置 ./configure --prefix=/usr/php \ --with-config-file-path=/usr/php/etc \ --with-gd --with-mysqli \ --with-openssl --with-zlib --with-curl \ --with-jpeg-dir --with-png-dir --with-iconv \ --enable-fpm --enable-zip --enable-mbstring \ 4 安装 make && make install
2.4 nginx支持PHP 修改nginx的配置文件:
1 vim /usr/loca/nginx/conf/nginx.conf.default
1 2 3 4 5 6 7 8 9 10 11 12 13 14 15 16 17 18 19 20 21 22 23 24 25 26 27 28 29 30 31 32 33 34 server { listen 80; server_name localhost; #charset koi8-r; #access_log logs/host.access.log main; location / { root html; index index.php index.html index.htm; //在这里添加一个index.php 用空格隔开 } #error_page 404 /404.html; # redirect server error pages to the static page /50x.html # error_page 500 502 503 504 /50x.html; location = /50x.html { root html; } # proxy the PHP scripts to Apache listening on 127.0.0.1:80 # #location ~ \.php$ { # proxy_pass http://127.0.0.1; #} # pass the PHP scripts to FastCGI server listening on 127.0.0.1:9000 location ~ \.php$ { root /usr/local/nginx/html; fastcgi_pass 127.0.0.1:9000; fastcgi_index index.php; fastcgi_param SCRIPT_FILENAME $document_root$fastcgi_script_name; //将/scripts改成$document_root include fastcgi_params; } }
访问php文件、不显示、直接下载的原因:
看题主配置里面有laravel,看来是跟php有关,如果是php,那么题主你应该先去下载php5-fpm才对,因为nginx本身不像apache一样会执行php程序,而是交给php5-fpm执行.
所以,题主你的步骤应该如下 :
下载php5-fpm
配置nginx,使nginx跟fpm通信,网上有很多配置方法,我不重复,这里指提醒一点 : nginx跟fpm通信方式有两种,一个是通过ip,一个是通过socket.fpm跟nginx里面要配置成同一种通信方式!!
最后测试是否成功.当然有可能到了这里还会出现访问页面下载下来的情况,如果遇到这个情况就需要再排查了,但是题主先搞定fpm比较稳妥.
3 安装MySQL 更新yum源:
1 rpm -Uvh http://dev.mysql.com/get/mysql57-community-release-el7-9.noarch.rpm
安装MySQL:
1 yum -y install mysql-community-server
Reference
写在最后 欢迎大家关注鄙人的公众号【麦田里的守望者zhg】,让我们一起成长,谢谢。


 wechat
 alipay
 bitcoin