1 创建laravel项目 创建laravel项目,需要使用composer工具,所以需要先安装composer,composer官网 。
然后使用命令行进行安装,安装命令如下:
1
2
composer create-project laravel/laravel {project-name} {laravel version} --prefer-dist {project-path}
其中,
{project-name}表示你创建的laravel项目名
{laravel version}表示laravel项目的版本号,默认是最新的版本
{project-path}表示项目创建的地址,默认是命令行存在的那个目录下,这个可以不用写。
2 启动laravel项目 2.1 方式1 在项目的根目录下,使用以下命令进行启动:
使用这个命令需要先将php添加环境变量中:
这种方式有一个缺点,就是如果关掉了这个命令行界面,那么laravel项目也就关掉了。
2.2 方式2 将项目放到nginx或者apache服务器中,这里以nginx为例。
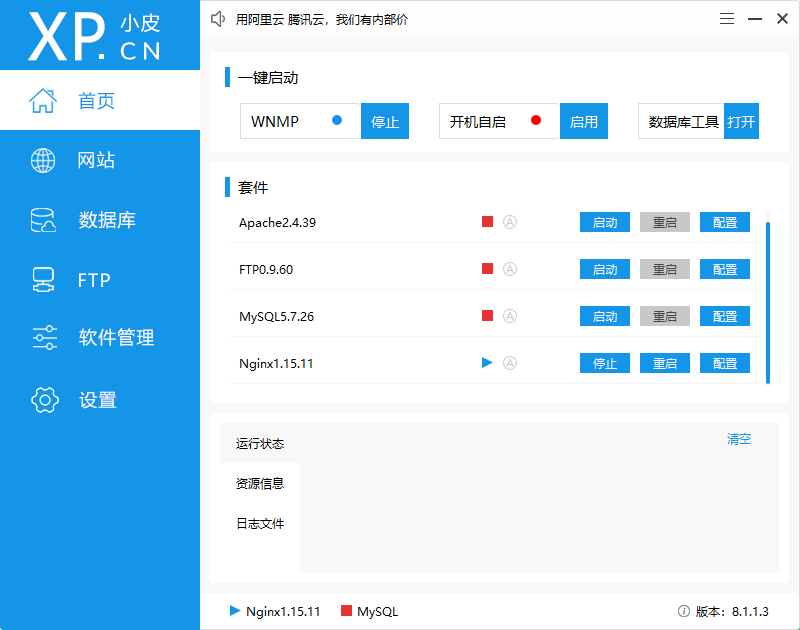
首先在Windows电脑上安装phpstudy 工具。
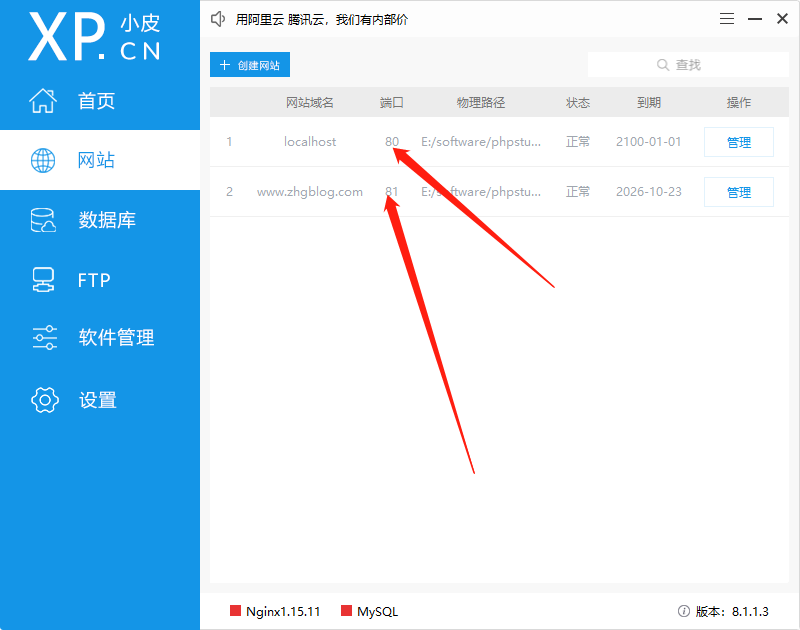
点击右侧的【网站】添加一个新的网站域名,这个域名是本地的域名,可以是任意的字符串,但是需要注意,如果自己创建了多个网站服务,端口号不能重复,否则会访问不到服务。
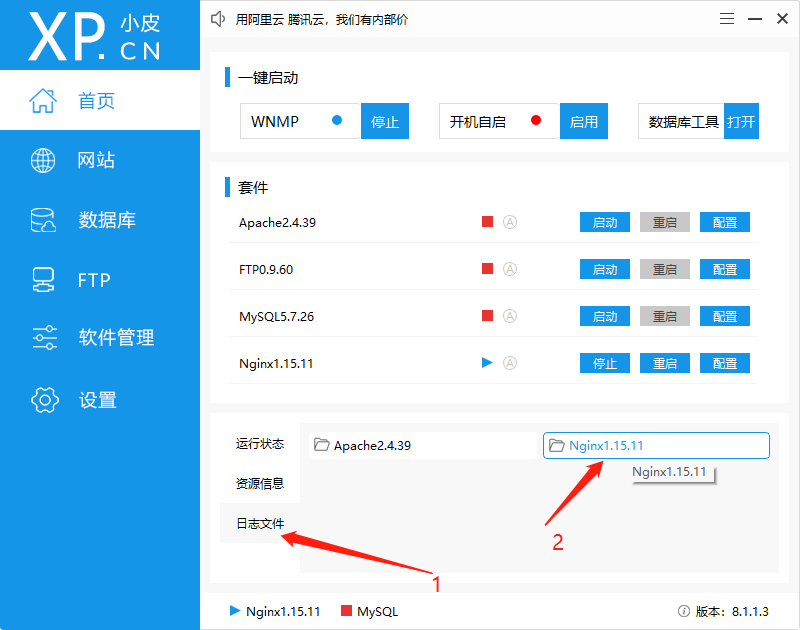
如果你的laravel是要给前后端分离的项目,也就是说前端是通过接口访问你提供的服务,你还需要在nginx的配置文件添加一个配置,才能访问,先找到nginx的配置文件的存放地址,按照下面的方式进入到nginx的根目录。
进入nginx的vhost目录下,找到自己的vhost配置文件:
打开配置文件:
1
2
3
4
5
6
7
8
9
10
11
12
13
14
15
16
17
18
19
20
21
22
23
24
25
26
27
28
29
30
31
32
33
server { listen 81; server_name www.zhgblog.com; root "E:/software/phpstudy_pro/WWW/myBlog/public"; location / { index index.php index.html error/index.html; try_files $uri $uri/ /index.php?$query_string; ## 添加这一行即可 error_page 400 /error/400.html; error_page 403 /error/403.html; error_page 404 /error/404.html; error_page 500 /error/500.html; error_page 501 /error/501.html; error_page 502 /error/502.html; error_page 503 /error/503.html; error_page 504 /error/504.html; error_page 505 /error/505.html; error_page 506 /error/506.html; error_page 507 /error/507.html; error_page 509 /error/509.html; error_page 510 /error/510.html; include E:/software/phpstudy_pro/WWW/myBlog/public/nginx.htaccess; autoindex off; } location ~ \.php(.*)$ { fastcgi_pass 127.0.0.1:9000; fastcgi_index index.php; fastcgi_split_path_info ^((?U).+\.php)(/?.+)$; fastcgi_param SCRIPT_FILENAME $document_root$fastcgi_script_name; fastcgi_param PATH_INFO $fastcgi_path_info; fastcgi_param PATH_TRANSLATED $document_root$fastcgi_path_info; include fastcgi_params; } }
然后重启nginx服务器就可以了。
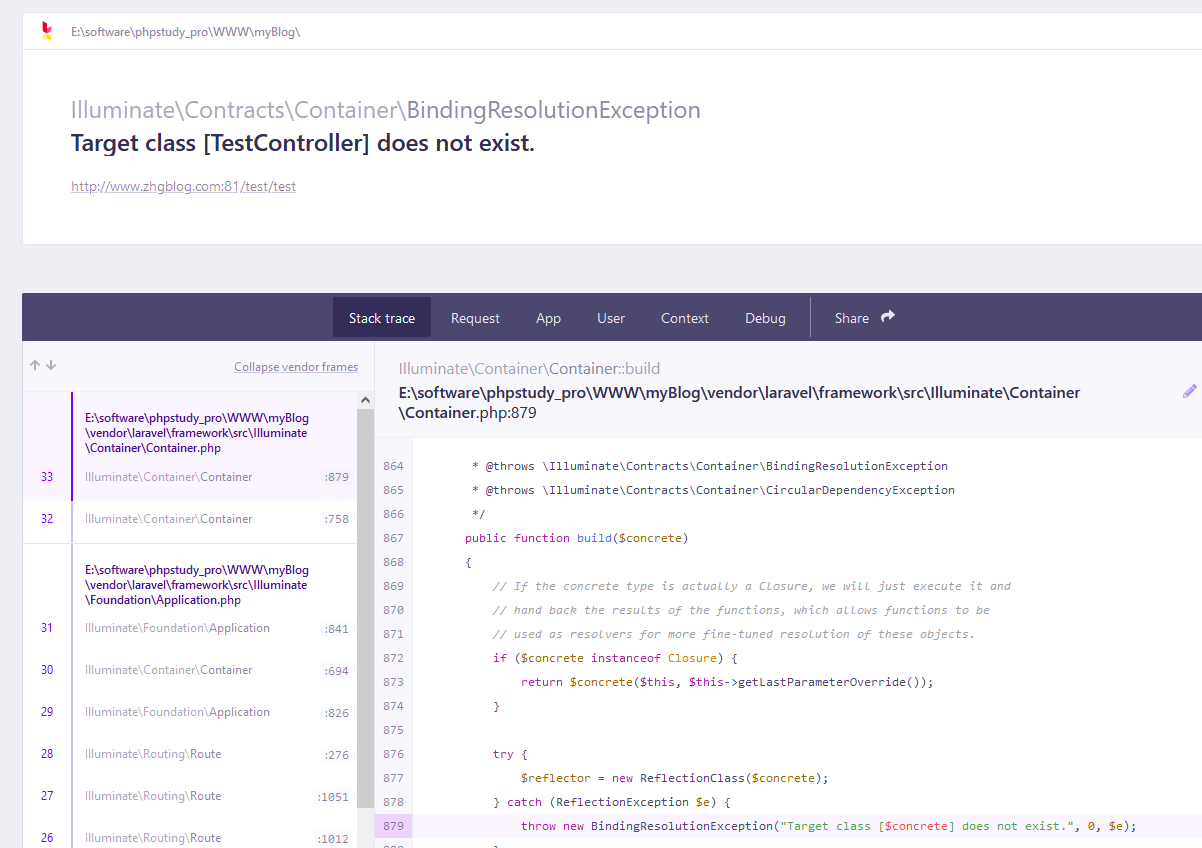
3 编写接口文件 在写测试接口的时候,提示找不到指定的class文件:
这个问题可以解决,找到app\Providers\RouteServiceProvider.php文件,然后将其中一行的注释给取消掉就可以了。
1
2
3
4
5
6
7
8
9
10
11
12
13
14
15
16
17
18
19
20
21
22
23
24
25
26
27
28
29
30
31
32
33
34
35
36
37
38
39
40
41
42
43
44
45
46
47
48
49
50
51
52
53
54
55
56
57
58
59
60
61
62
63
64
<?php namespace App \Providers ;use Illuminate \Cache \RateLimiting \Limit ;use Illuminate \Foundation \Support \Providers \RouteServiceProvider as ServiceProvider ;use Illuminate \Http \Request ;use Illuminate \Support \Facades \RateLimiter ;use Illuminate \Support \Facades \Route ;class RouteServiceProvider extends ServiceProvider public const HOME = '/home' ; protected $namespace = 'App\\Http\\Controllers' ; public function boot ( { $this ->configureRateLimiting (); $this ->routes (function ( Route ::prefix ('api' ) ->middleware ('api' ) ->namespace ($this ->namespace ) ->group (base_path ('routes /api .php ')); Route ::middleware ('web' ) ->namespace ($this ->namespace ) ->group (base_path ('routes /web .php ')); }); } protected function configureRateLimiting ( { RateLimiter ::for ('api' , function (Request $request ) return Limit ::perMinute (60 )->by (optional ($request ->user ())->id ?: $request ->ip ()); }); } }
4 Laravel 不同环境加载不同的.env文件 假设有4个.env文件,分别为
1
2
3
4
.env.local .env.dev .env.test .env.prd
方式一 第一步:[pro_name]\bootstrap\app.php 加入代码
1
2
3
4
5
6
7
$envs = ['local' ,'dev' ,'test' ,'prd' ];$env = get_cfg_var ('env' );if (empty ($env ) || !in_array ($env , $envs )){ exit ('no env files' ); } $env = '.env.' .$env ;$app ->loadEnvironmentFrom ($env );
第二步:php.ini文件中添加一行
方式二 假设不同环境域名分别为:
1
2
3
4
local-domain.com dev-domain.com test-domain.com domain.com
在 [pro_name]\bootstrap\app.php 加入代码
1
2
3
4
5
6
7
8
9
10
11
12
13
14
15
16
17
if (!$app ->runningInConsole ()) { if (empty ($_SERVER ['HTTP_HOST' ])) { die ('[error] no host' ); } $app_env = substr ($_SERVER ['HTTP_HOST' ],0 ,strpos ($_SERVER ['HTTP_HOST' ],'-' )); } else { $app_env = $app ->detectEnvironment (function ( return 'prd' ; }); } if (empty ($app_env )) { die ('[error] no environment' ); } $app ->loadEnvironmentFrom ('.env.' . $app_env );
Reference
写在最后 欢迎大家关注鄙人的公众号【麦田里的守望者zhg】,让我们一起成长,谢谢。


 wechat
 alipay
 bitcoin